Showing posts with label Relaxation. Show all posts

Monday, July 23, 2012

Deep Breathing : Facilitated Technique for Kids

The human body is adaptable and can survive under a variety of harsh conditions. People have been known to survive for up to 2 months without food and 1-2 weeks without water, but it takes less than five minutes for us to perish without air. Yet the average person only uses about one seventh of their total lung capacity. As vital as this function is to life, most of us pay very little attention to it until our ability to breathe is compromised.

The basic function of our breath is to move air in and out of the lungs. It affects our metabolism & energy level, cognitive functions (the brain uses three times more oxygen than any other cells in the body), blood and oxygen delivery to the cells and removal of carbon dioxide from them.

Breathing is also one of the limbs (or elements) of yoga practice and in some opinions, the most important. In yoga practice we learn that the other functions of breathing are to release muscle & mental tension, calm, regulate & revitalize the nervous system, improve immunity and improve thinking. We learn that in time of stress or when in pain, to bring our attention back to the breath brings about calm, relaxation and healing in the body and the mind.

When I begin to teach "Belly Breathing" techniques to younger students, I do so by using games. Feathers, soap bubbles, cotton balls and an expandable "Breathing Ball" (AKA "Hoberman Sphere") can all be used to show children how to take a proper breath and to train their young bodies to do this naturally and consistently before stress and other bad habits set in.

As children grow older, and play less, its easy to forget these techniques and how important they are. Its vital that kids and teens fully understand the power of their breath to support health, enhance learning, assist with stress and improve interactions with others. Its our job to encourage them daily to close their eyes and just focus on their breathing - just as we ensure they eat, brush their teeth, do homework and bathe daily.

Set aside 10- 20 uninterrupted minutes a day of deep breathing time (or to play breathing games) with your children and teens. It doesn't matter when, but a good way to do this is to get them into a routine, such as right after school or before bed. If they practice while they are calm and in a safe familiar environment, they will be more likely to use these and other healthy techniques when angry, stressed, in pain or trying to solve a problem.

One of the questions I hear regularly is how to teach deep breathing concepts and mechanics to non-verbal children or those with more severe physical or cognitive challenges.  Many of these children do not have good body awareness & can't even begin to isolate a muscle such as the diaphragm (breathing muscle.) There is a facilitated technique that I use, that parents and therapists can also use to encourage use of the diaphragm for deeper "Belly" breathing. The basic  technique is explained below, however it is not meant to replace traditional therapy. Please check with the child's doctor and medical team to be sure this method is advised for your child or student. In some cases, the technique may need to be modified for safety and/or effectiveness.

The facilitator, whether a parent or therapist needs to make a conscious connection with the child so this exercise is to be done in a quiet room, free of drafts, strong odors & other excessive sensory input: auditory or visual noise, TV, phones, computers, electronics and all other distractions & interruptions. Lights can be dim and quiet instrumental music (low volume) can be played if desired. The initial exercise will take about 5-10 minutes.

1- Have the child lie down on floor, face up, on top of padding, a folded blanket, a mat or on a carpeted area.

2- Place a small flat (about 1-2" ) pillow or folded towel under head and a rolled blanket or bolster under (slightly bent) knees for comfort. Shoulders, hips, lower back and soles of feet should all have contact with the floor.

3- Sit on floor next to child & watch child's midsection for a minute as it rises and falls with the breath. Notice the rhythm, speed and depth of each breath. (You may notice that the child breathes into the shoulder area. Watch for this too.)

4- Place your open hand on the child's midsection, just under the ribcage and just above the naval and let it rest for a moment, feeling the child's breathing, and again, noticing the rhythm, speed and depth.

5- After a minute or two of quiet bonding with the child, and following the child's rhythm and depth, begin to apply gentle but firm pressure downwards as you see & feel the child's midsection fall (exhalation). As the child breathes in and the midsection rises again, release pressure and allow hand to just rest there until the exhale. Upon the next exhale, apply pressure again. Release pressure upon the inhale. Be aware of where you feel that point of resistance while applying pressure, and back off as soon as you feel it.)

6-Continue the exercise for 5 minutes or until the child indicates that they want to get up. (Its not uncommon for them to fall asleep and this is OK too.) You may find yourself and the child breathing together in rhythm by the end of the exercise.

7- When you start to see & feel the child breathing deeply on his or her own, (the time it takes for this to happen varies from a few weeks to a few months.) you can adapt this exercise to use a 1 lb.sandbag on the child's belly instead of your hand.   (Usually 1-4 lbs depending on their medical conditions, strength, size and tolerance ) Also lying the child on their stomach (especially mouth breathers) will give them deeper input and awareness of the breathing muscle encouraging deeper, fuller breaths.

8- Once the routine is established, the use of sound can encourage deeper breathing & relaxation. Facilitators can use simple words or vowel sounds as the child inhales and exhales: "belly...breath"; "just...breathe"; "breathe...relax"; "breathe...calm"; "in...out"; "me...you"; "sea...shells"; "let...go"; "aaaa...eeee"; "Jo-ey" (child's name) or the Traditional Mantra of  "Soo...Hummmmmm".

A little practice daily is better than hours of practice once and a while. Its not necessary to teach a child several types of breathing all at once. Let them master deep Belly Breathing first as it is the most useful type of breathing for kids. As the child breathes better without facilitation, and can do it while sitting or standing, you can introduce other types of breathing if desired through games that help reinforce breath control.

The keys to successful & effective breathing techniques, facilitated or not,  is to be attentive to the child and to be patient. It may seem like your child is not "getting" it, but don't doubt that deep breathing exercises are still beneficial in a variety of ways, maybe unseen at the moment,  for him and for you.  Remember that no matter how minimal, progress is progress.


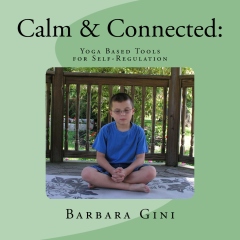
This technique is included along with many others, in my forthcoming book: "Calm & Connected: Yoga Based Tools for Self-Regulation" . Watch for details next month.

Related Articles:

If You Give a Kid Their Core...


Contact: barbara@bodylogique.com


.

Thursday, June 21, 2012

Listening Pose (Seated Savasana)

Peace Pose
I think most of us who teach or practice yoga would agree that the best part of a yoga class is the end - Savasana -where all outer body movement ceases and we allow ourselves to tune in to our inner bodies.

Years ago when I first began teaching children's yoga, it was a challenge to get 10-15 children to actually lie still and quiet so that they could tune into their inner world.  Through trial and error, I learned how to creatively take the energy they were sending out to me and direct  it to where I wanted them to be. I often use the imagery of a Starfish lying in the sand at the bottom of the ocean as our ending savasana pose. Recently, I've been experimenting with other positions to encourage the tuning in and relaxation of the body, in environments other than the yoga studio or sensory room. I've been working on postures for an environment that children are in a good portion of the time: a classroom.

Starfish pose or traditional savasana (corpse pose) may not be a posture that a child can use when in a typical classroom. If the classroom is an inclusion room, this may not be possible either due to space restrictions or disruption. However, a student can be taught to modify a different, more practical posture and use an imagery that will not be disruptive to a teacher or to other students. One that I like to use is "Peace Pose" (pictured at top left).

One does not need a mat and one does not need to sit cross legged to practice it. You can do this seated in a chair. Be sure to keep spine straight (or against the back of the chair) hands on knees, feet flat on floor and breathe in & out from the belly slowly and deeply. Imagine breathing in Peace and breathing out stress/confusion/ frustration or whatever it is we are trying to get control of.

We can imagine we breathe in what we want and out what we no longer  need.  I also have the kids imagine they are breathing into each part of the body, starting at toes and going all the way up to their hair. As their breath flows out and into the atmosphere, they imagine, (as one student puts it)  all 'the bad stuff going with it'!

Peace Pose:
Adapted to a therapy ball
Students (and teachers) can use this technique for a variety of self-regulation purposes: to remain calm, to solve problems, to think before acting, to prepare for a transition or to feel more grounded, focused, safe and confident.

Depending on the student, group or what specific resonance or association you want the posture to have you could call it:

  • Peace Pose
  • Listening Pose
  • Calm Pose
  • Quiet Pose
  • Easy Pose
  • Statue Pose
  • Thinking Pose
  • Seated Savasana
Just be sure to keep consistent with what you name it.

By teaching children that they can feel calm & safe when sitting on a bus, in a movie theater, at their desks or anywhere, we broaden their concentration & stress management skills and help them become more self reliant and adaptable to the many changes and challenges that Life holds.


Contact: Barbara@bodylogique.com


Related Articles:


Peace Garden Guided Imagery


The Breathing Ball (Video)


Glitter Ball (Video)


Starfish Guided Imagery


to purchase our books on Amazon


.

Monday, June 11, 2012

The Big Myth of Meditation

I recently was visiting at a special event and sat in on a family yoga demonstration. Towards the end of the demonstration, the teacher told the children they were going to relax and empty their minds of all thoughts so they could relax even more.

One child, sitting in the back near me, became very distressed and said,"But I tried that before and every time I try to empty my mind, I just can't stop thinking. The thoughts just keep coming and coming and they just don't stop! How do I get them to stop?"

I could understand his anxiety. Its ridiculous (and a little scary) to think of the mind not thinking. In fact, it doesn't make any sense at all.

While I know that teacher meant well, and was trying to re-assure him when she replied "Just try",  the words and manner in which she was showing them had just the opposite effect of what it should have. Although there was just one boy who asked how to empty his mind, I wonder how many others in that group wondered the same thing?

The biggest myth of meditation is that our minds need to be empty. The single purpose of the mind is to think. A more accurate description of meditation is that we are becoming aware of or directing or focusing our thoughts. We can focus on a sound, a color, a single image, our breath, an experience and that is what brings awareness, slows our racing and random thoughts down, reduces stress and allows us to function more efficiently.

We have to keep in mind (pun intended) that there are several styles of meditation, and, when teaching children, we have to be mindful of the type and manner in which we teach them. Sometimes we say meditation when we really mean relaxation which is related, but not the same thing. These useful techniques must be taught in a kid-friendly step by step manner or they will not be able to be understood and utilized effectively. Children will not have the same experience as an adult will so we have to break it down and help them have their own experience and understand what uses these techniques have.

Right now there is a huge push for mindfulness in schools. But we need to first understand exactly what it is we are teaching and for what purpose before we start doing it, or we run the risk of:

1) no one taking any of it seriously
2) of causing more anxiety as I spoke of at the beginning of this post
3) giving the impression that the techniques don't work or cannot be taught to children, (and we know neither of these are true!)

Meditation is, generally defined:

"Meditation refers to a family of self-regulation practices that focus on training attention and awareness in order to bring mental processes under greater voluntary control and thereby foster general mental well-being and development and/or specific capacities such as calm, clarity, and concentration..."

For our purposes, this can be broken down further in to two main categories:

  • Concentrative Meditation: (Focused Attention):  Voluntarily being attentive to and focusing on a particular object
  • Mindful Meditation: (Open Monitoring (OM) ):  focusing on moment to moment experiences, and learning how to be aware and not react to them 

In either type, the observer is fully aware and participating in the process. Each type has a specific purpose & will have specific effects on the brain and body.

So how do you know which one to teach and use with children? The answer is that it really depends on the children.

The first thing to remember is to keep it simple and not too serious. It needs an element of fun to be effective with kids. Make it a game. I call it "Imagery" or the "Imagine Game" or the "Concentration Game".

Meditationmindfulness, are big, fancy words for little kids and its doubtful that they will have any school teacher that will tell them to "please be mindful of your behavior" or to  "meditate on these math problems..."  They will however hear a teacher tell them to concentrate; focus; pay attention. So we need to define why we want to teach them the techniques and then teach them in simple common language so they can understand what it is that they are learning to do.

 Don't rush the process and allow children to come to conclusions and realizations on their own. I've listed 4 basic steps and some activities below that I have found effective. Give each step as much time as needed for each child to grasp the concept before taking it up to the next level. Some children may stay at one level and that is fine too.

Consider the outcome you are intending, along with the age, maturity level and abilities of each child before selecting and doing these or any other mindful/meditation activities:

1) Children relate better to tangibles rather than abstract concepts, so the first step is to teach them to focus on an object. I like to use natural objects such as shells, stones, leaves, flowers, etc. Have each child select one from an array and then have them really observe the color, shape, unique qualities and other details they can visually identify about it. Do this for a few minutes. Then have them place all the objects in a bowl, and mix them up. Pass the bowl around and one by one, see if they can retrieve their own object again.

2) You can then have them focus on sounds, sensations or smells in the same way: (sounds) instrumental music, ocean or rain forest, their own breath; (sensation) a feather brushed across their arm or leg, the feeling of a sea shell in their hand; (smell) spearmint plants, coffee beans, cookies baking or chamomile tea bags.  Have them describe how that sound, sensation, or smell makes them feel,or what it reminds them of (A place or an experience.)

3) Next try some simple guided imagery, of a place where they feel happy and safe, such as grandma's house, the beach, playground, zoo, aquarium, garden, amusement park, etc. Allow them to form an image in their mind and imagine it as detailed as they can for a specified amount of time (ex: 5 minutes) Then have them share their imagery with the group, verbally or by journaling.

4) Then have them work on thinking of an event that made them feel sad, such as an argument with a friend or a favorite toy that broke. Have them imagine that they are watching the experience or event from inside a big window and the event is taking place outside of the window. Take them through the experience and have them imagine how they would like to see the situation resolved. Have them 'see' that resolution happen outside the window.

In my experience, it is only after a progression of steps, such as those described above have been introduced and practiced, does a child start to understand how to use these techniques in the present moment.

Its not difficult to teach meditation techniques to children-all children, no matter what their abilities- but it does need to be taught patiently and in a thoughtful practical manner, (and always in the spirit of fun), so they can retain and apply the techniques independently whenever they need them the most.

Would you like to help your child recognize the signs of stress and teach them how to address it independently?

Calm and Connected is a step by step resource for parents and educators with dozens of class and kid-friendly meditation games activities & techniques to use for teaching children how to improve their sense of self calm & maintain better focus.

 Learn more and order your copy here.


For Further Discussion:


Do you think mindfulness & other forms of meditation is beneficial to kids and should be taught in schools?Why or why not?

At what age should children start to learn these techniques?

Please leave your thoughts in the comments below.


Related Articles:


 Self Calming in the Peace Garden

The Art of Engagement

Sensory Scavenger Hunt

Labyrinth Adventures


Subscribe to S.M.Art Kids / Healthy Kids by Email


Contact: barbara@bodylogique.com


Wednesday, April 4, 2012

Rice & The Art of Engagement

Sea Turtle Mandala
Photo: ©2011  B.Gini
A few years ago, I was asked by Greenshire Healing Arts Center to provide a community art project for a Youth Peace Summit that reflects the theme of "Peace". What is better as a symbol of unity than a community Mandala?


Mandalas are circular, symmetrical designs that have been used for centuries as a tool for meditation & reflection, and in more modern times by Sigmund Freud as a tool for psychoanalysis. I have drawn many mandalas over the years and find them to be a great tool for engagement in self-reflection, peaceful, focused thought and creative problem solving.


I was not sure how to proceed at first, and after a few ideas that I rejected, I finally envisioned a design: The Earth encircled by a rainbow-(the symbol for Hope as well as a symbol of diversity) two Doves with olive branches (symbolizing Peace) A Heart at the base is for Love, Friendship and Acceptance, and Lotus petals framing all 4 corners, represent the progress of working towards Peaceful interactions. (A lotus grows up through the mud to blossom into a fragrant, perfect bloom. I have observed & known many people with that same ability.) I drew the design on brown paper that painters use to cover surfaces when working.


The Mandala was made with colored rice-a technique I became familiar with through my Friend Ritu who who also does the most amazing Henna and Batik you have ever seen! She has been doing this beautiful ancient art for many years. She was my inspiration for the building of this project & this was my first time doing such a large piece.


Each grain of rice, being placed on the design by at-risk teens of all ages was the epitome of Peaceful interaction not just with each other, but within themselves. I noticed that as each area of the design emerged-one small spoonful at a time- the kids became fully engaged in the tiny colorful grains. One remarked that she felt as if she had become part of the design itself.

That is the beauty of this process. As each individual works on a part of the design, and as it emerges, it brings self- reflection to the individual, to the group & to the larger community. It helps us realize that even though we are individual and unique, we are all part of something much larger than ourselves. The mandala making process becomes the Art of Engagement which is the basis of all peaceful interactions.

When the design was finished, it was displayed in the gallery for a week, then dismantled, much as Tibetan Mandalas are. To me, this represents impermanence & non-attachment. It reminds me of the fragile nature of Life & affirms that any positive change begins with a single thought from a single person-just as this design began with a single spoonful of rice.

Being who I am, I have adapted this activity to use with my younger groups & my students with sensory challenges. From their perspective, it is a fun, calming, multi-sensory activity that helps them learn to focus, share, engage & follow through with a project to completion. For the younger kids, I use simple terminology & call the designs 'mosaics', or 'rice art' and I make them permanent by using a little bit of white glue before the rice is added.

So many Life & Social skills can be learned through this activity! Its a perfect activity for outdoors and is the method I prefer. If you are going to do it inside, let the kids assist through the entire process by helping color the rice, set up the area & clean up at the end. If rice spills, gently guide them to help clean it up. Wherever you decide to set up the activity, be sure to allow plenty of time. It’s counter-productive to rush children through the process.It may even be helpful to set it up at a 'sensory station' and let the kids work on it at intervals during the week.

Supplies are simple: Plain, heavy duty paper plates, round or square (not Styrofoam) OR shoe box lids. (You can also use aluminum pans or plain color plastic trays) rice, food coloring and hand sanitizer. There are literally thousands of ideas and patterns online. Start with simple geometric shapes and build more intricate designs as the skill and attention level increases.

To see an instructional video of how to color the rice, click here: Colored Rice Technique.

 
To find our e-course on designing mandalas for stress management go to:
10 Minute Mandalas

I know there are hundreds of other ways to use colored rice. Tell us your ideas in thecomments below!


To see some photos of the activity in progress, watch the video below.


Contact: barbara@bodylogique.com


Monday, April 2, 2012

Self Calming in the Peace Garden

Photo: Anita Martinz

Spring is here and for many families it may be filled with more activity than usual. Families visiting, spring festivals, outdoor events and gatherings are added in to the mix of the regular work, family and personal obligations.


While the approaching spring season and the break from school is a time of outdoor fun, vacation & renewal for some, for others it means more pressure, fuller schedules & new situations to manage.

If you are the parent or family member of a sensory challenged child, not only can the time change, longer days, new activities & events be a bit stressful, but so is the anticipation and concern over how your child might read, transition and respond to the new schedule, warmer temperatures & the break away from peers & educational and therapeutic support.

One of my favorite techniques for counteracting stressful transitions is Imagery. It’s easy and effective and anyone can learn it for personal use without any equipment or extensive training.

Imagery is used by counselors, doctors, athletes and everyday people. It is simply creating a detailed picture  in your mind's imagination. Imagery can be of an object, a word, a place or a situation. We use this simple yet powerful tool all the time without even knowing it to create positive calming images as well as stressful ones. Every time we relay a story about someone who helped us (or who hurt us) we are re-creating that experience in our and other's minds. However we responded to it in real life will be exactly how we (our bodies, minds and emotions) respond to it in imagery. The more frequently we can create and hold calming, positive images in our mind, the calmer and in control we will feel when our world is a little uncertain.

One fourth of the brain is involved in visual processing; more than any other sense. This is why Imagery is such a powerful tool. Seeing something is the best way that we take in information and learn. This is especially true for children. It doesn't matter if we actually see it or if we create an image in our mind's eye. The brain can't tell if its 'real' or imagined & the effect is still the same. Children can use this technique very well once taught.

Imagery can be guided verbally or facilitated with photos & quiet instrumental music. The child can sit on the floor, on a cushion or a comfortable chair or even lie down. Ask the child to close her eyes and listen to her breathing. Speak softly and slowly and allow momentary pauses in between sentences to allow the child to form a picture in her mind.

Here is a simple imagery to get you started:


My Peace Garden:

Close your eyes. Take 3 slow, quiet breaths. We are going to get ready to go on a visit- to a beautiful place that belongs just to you. This visit will take place in your own thoughts and you can go there anytime you want-when you are sad or angry or when things get hectic & you just want to go to a safe place for some quiet time to yourself.
Now, take a big slow breath & imagine that you are walking outside-along a path. It’s a beautiful sunny day and you can see the blue sky, the clouds & hear the rocks and the gravel crunching under your feet.  As you are walking you feel safe & happy !

As you walk a little more you come to a beautiful garden! See this garden in your mind. It has so many beautiful flowers of all of your favorite colors. What colors do you see? Can you small them? There are many butterflies fluttering around in the flowers.  As you walk more into the garden you can see apple, pear and cherry trees and hear colorful birds tweeting in the branches. There are so many kinds of amazing plants and animals!  What kinds of animals do you see? There is also a very special [chair, rock, swing, mushroom, etc] for you to sit on while you are visiting.  As you see all the flowers and all the animals you feel so safe and happy and you know this is a special place! This is your Peace Garden.  Whenever you come here, to relax or to think, you will feel safe, happy, and peaceful.

In a few minutes, it will be time to say goodbye., but remember that you can come back again to your Peace Garden soon for a visit.

Get ready to take a big breath and on the count of 3, you can open your eyes. 1-2-3...


Its important to allow a block of undisturbed time-no cell phones or interruptions. This process should never be rushed. If you decide to do it for 3 minutes that's fine. 30 minutes is also fine. It depends on what the situation is and how long of a break your child needs.

When ending this activity, bring the child gently & gradually out of the imagery or it could have a jarring, unbalancing effect on the child. Have them sit and talk for a few minutes about what they 'saw' in their garden. If they are non-verbal have them color for a few minutes before resuming other activities.

For children with diminished receptive language skills, make a small collage (preferred technique), scrapbook or photo album and include color photos or drawings to set your imagery theme (Example: garden, beach, animals, the woods, etc.) Include a few photos of the child in these places & doing activities. Allow them to look at the images while quiet music plays. Talk to them in a quiet voice about the images and how calm the pictures make them feel.

The best way to learn to guide your child through this process is to practice this yourself first. Children learn from our own example. Be willing to manage your own stress & look for signs of stress in your child. It’s a good idea to introduce imagery at a time when the child is already calm and practice a little bit every day to make ‘calm’ a habit. Teach children to recognize stress too and when they do, go to a quiet place and use this imagination technique before stressful feelings get out of hand.

To learn more about how guided imagery can help you and your child read the Care for Caregivers Blog:

Its All in Your Head: Using Imagery to Improve Health

or contact: barbara@bodylogique.com


Thursday, February 2, 2012

Connect with Your Inner Groundhog


Punxsutawney Phil
February 2 is Groundhog Day in the United States and Canada. According to folklore, if it is cloudy when a groundhog comes out of its burrow, then spring will come early. If it is a sunny day, the groundhog will (supposedly) see its shadow and go back into its burrow, and winter weather will continue for six more weeks.

The celebration started as a Pennsylvania German custom in southeastern and central Pennsylvania in the 18th and 19th centuries and has its origins in ancient European weather lore. A badger or sacred bear was central to the prediction of weather, based on their hibernation habits. How the Groundhog got caught up in it is unclear.

The Groundhog custom is similar to the Pagan festival of Imbolc, (the seasonal turning point of the Celtic calendar,) which is celebrated on February 1, halfway between the Winter Solstice and the Spring Equinox.

Groundhog facts:

 
•"Groundhog" and "woodchuck" are different names for the same animal, from the ground squirrel family.

•Using only their teeth, claws and strong limbs, groundhogs dig  burrows up to 5 feet deep and 45 feet long.

• Their noisy reactions to being disturbed, includes whistling, squealing, barking, chattering and grinding their teeth.

•While most squirrels eat seeds and nuts, groundhogs mainly graze on grass and leaves, & sometimes insects, snails and bird eggs

•Groundhogs are one of the few true hibernators, relying entirely on body fat to make it through winter. Their heartbeat slows from 75 beats per minute to as few as 4, and body temperature drops from the 90s into the 40s (F).

•Groundhogs have an average lifespan of ten years in captivity and six years in the wild, with a maximum lifespan of 14 years in captivity documented

•An internal biological clock controls when wild groundhogs wake up from hibernation, but coming out of the burrow depends more on temperature than intuition.

• Groundhogs have been known to be aggressive & usually try to avoid contact with people.

•According to records kept since 1887, Punxatawney Phil's predictions have been correct 39% of the time

Native American Legends

Native American lore tells us that the Groundhog is a symbol of understanding the power of cycles, knowing when to hibernate, building & the ability to go underground. Groundhog inspires us to pay attention to our dreams, dig beneath the surface to get to the truth, study a specific subject or area of interest, such as yoga, or  meditation and learn to relax. He is a reminder to not  paint ourselves into a corner and always have several ways to exit from negative situations, add more vegetables to our diet, study the seasonal changes and apply the wisdom of changing cycles in daily life.


Groundhog Pose
Photo ©B.Gini 2008
To help you find your inner Groundhog, I've included a 'Groundhog Pose' image (at right) a resting posture for you and your students to practice between activities and to settle nervous energy after recess or tests.

To modify, you can practice this posture by remaining in your chair, & setting your head on your desk. Arms can relax at sides (in this photo the Groundhog was "digging".) Close your eyes and breathe deeply into the belly and then breathe deeply into the back of the body. Breathe in relaxation and breathe out all the thoughts that don't serve you any more.

Imagery:

Imagine you are a little groundhog, safely hibernating in your warm, comfortable burrow.

Benefits of this pose:

•Gently stretches the hips, thighs, and ankles
•Calms the brain and helps *relax stress and fatigue
•Relieves back and neck pain when head and torso are supported on pillows

*(Enhance the relaxing effect of this posture by playing nature sound music or Native American Flute music such as N.Carlos Nakai or Mary Youngblood. Students may rest foreheadon hands, and use shawls or warm, heavy blankets to cover themselves to create their own"burrow". Blankets help create a sensation of body awareness, and of safety and security, which further relaxes the body and brain.)

 
*Download a free "Groundhog Pose" Photo flash card here!


Tell us your "Inner Groundhog" experience in the comments below!
 
 
.

Sunday, January 15, 2012

Helping Your Child Sleep Well

Illustration by:
Mariko Francis


It is estimated that as many as 30% of all children may have a sleep disorder at some point during childhood. Sleep disorders can impact health, school performance, day to day activities  & social-emotional adjustment. For this reason it is important for both parents and educators to understand these disruptions and simple ways to  assist children to rest and sleep better.


After just 1 night of poor sleep, the decision making part of the brain shuts down & anxiety takes over. After a few nights of disturbed sleep, blood sugar and electrolytes go off balance & concentration on even simple tasks is extremely difficult if not impossible.  Long term sleep disruptions cause lower immunity, elevated stress response, changes in mood, obesity, depression and diminished ability in cognitive functions.


While the average adult requires 8 about hours of sleep per night, babies 1-12 months old, need at least 14-15 hours of daily sleep. For children ages 1-3, the average amount is 12 hours; age 4-12, 10 hours; and for teens, 9 hours a night.


Although these numbers are ideal, many children do not come close to reaching them & getting the restful sleep they need. In particular, ADHD and sensory challenged children cannot get to sleep, and when they do finally get to sleep they have a hard time staying asleep.


We all want our children to participate in recreational activities, however, please be selective about how much and what kind of activities you allow your child to engage in. Children need down time-time to rest. What may seem like a fun & active schedule to adults can be overwhelming, deplete energy & disruptive to a child’s healthy sleep patterns, and leave everyone feeling tired, cranky and unbalanced.


One of the distinctions I like to make is that rest and sleep are two different things. The human brain needs both to function properly.

Sleep is a passive, unconscious activity in which only the brain, heart and lungs are active. There is no conscious awareness of the environment. Rest is when you are fully & consciously aware of your surroundings. The environment might be neutralized from all excess sensory stimulus, activity stops and thought is directed to less intense processes-(such as towards the breathing or a specific mental image in order to calm and 'recharge the batteries'. This is commonly called imagery or meditation. I will discuss these techniques in my next article.)

For now, below are three of the most common sleep problems and some tips to help address them:


Problem:
Can’t get to sleep: Mind is racing-can’t “shut it off”.

Try This:

• Stick to a consistent bedtime & waking schedule no matter what. Exposure to light/dark at the same time every day helps the body regulate itself to sleep and waking activities.

Supported Child's Pose
Photo ©2011 B.Gini
• Exercise! But not within 4 hours of bedtime. Movement (such as gentle yoga) will help release excess muscle tension and facilitate restful sleep. Try restorative postures like "Supported Child's Pose" pictured at right.

• Shut off the TV, computer and video games at least 30-45 minutes before bed. The flashing images stimulate the brain and cause an adrenalin response, similar to the stress response, that prevents sleep.


• Do a calming visual activity to wind-down. Coloring, painting, bead necklaces, Colorforms or making a collage or album of peaceful images will assist in the calming process and transition to bedtime.


• Take a warm bath. Warm bath water raises and lowers the body temperature, making it feel tired. You can also try 3 drops of chamomile essential oil in the bathwater. *(Please use aromatherapy with caution with allergic & sensory challenged children! Read more about Aromatherapy here.)

A simple "Bed-Night" snack (as my friend's daughter used to call it) with a combination of carbs, calcium and protein about 30 minutes before bed will also help to induce sleep.


Problem:
Won’t stay asleep: Eyes open same time every night.

Try This:

• Absolutely NO caffeine/Sugar for 3-4 hours before bed time. These chemicals stay in the system for at least 8 hours preventing the brain from entering deeper sleep.

• Read a bedtime story, look at photo albums or play an instrumental music CD, (designed to distract, not engage the attention) until sleep happens.

• Darken the room as much as possible. Light from a night light, clock, streetlamp, or iPod passes thru eyelids and signals the brain to ‘wake up’. You can use a bandanna or scarf to drape digital clocks.

Acupressure
Photo ©2011 B.Gini
• Encourage the child to stay in bed. Show then how to gently self-massage the hand, (shown at left) foot or scalp to help relax them back to sleep. (There are thousands of nerve endings in each hand and foot as well as the scalp. Massaging gently in a circular motion with help give input to the sensory system, signaling it to relax. Heavy work activities & a  deep pressure massage on back, arms and legs before bed will help calm the sensory system for several hours.)

Problem:
Auditory Sensitivity- Falls right to sleep, every sound wakes her up.

Try This:

• Natural, low level soothing sounds of nature helps calm and soothe an over reactive auditory system.

• Pillow position: ensure that neck and spine are aligned to relieve cramps and discomfort. Use a flatter pillow for stomach sleepers.

• Remove furry family members. Pet activity increases late at night and the early AM and will disturb human family members.

• Transition time: Take at least 45 min to an hour to prep for next day before going to bed: pack backpack, make lunch, lay out clothes, etc. Then prep self: brush teeth & hair and do some yoga or stretching before relaxing in bed with deep breathing or soft instrumental music.

Another little known strategy is to encourage the child to lie on his/her Right side. (For older children you can use stuffed animal to hold or a pillow to 'hug'.) The reason is that every 30-40 minutes our nostril dominance changes-meaning we naturally alternate breathing (primarily) out of one nostril or the other. The side we breathe in and out of will stimulate the opposite side of the brain. Sleeping on the right side, encourages the left (top) nostril to open & will stimulate the area of the brain that controls calming & restful sleep.

Sleep Well!

For more information on Relaxation, please contact me at:
barbara@bodylogique.com


Related :


Playing Outdoors Can Improve Sleep
.

Tuesday, September 6, 2011

Pool Noodles-Part 2

As we wind down the summer activities, and put away the beach buckets, shovels, nose plugs and pool toys, I again fall into my habit (some call it a "talent". I'm not so sure about that!) of finding the potential to adapt & use items for purposes they were not intended for! Today our target is again, Pool Noodles.

In my first related post, "Use Your (Pool) Noodle" (see May's Archives) I showed you how to use pool noodles as a "Pizza" roller for deep muscle and tactile input all over the body for sensory integration. Today is a follow-up & related activity and another great use for pool noodles to stimulate pressure points in the feet and hands.

Reflexology & acupressure are two little known tools for self-calming & improved focus. Massaging specific points on your hands & feet with your thumb will help reduce anxiety, stress and tension.  The pool noddle is a fun way to get children to do this regularly. It will massage and stimulate all the pressure points (about 5,000 of them in each hand and foot)  and have a regulating, grounding & calming effect. This is especially useful for children with poor hand strength & diminished fine motor skills who cannot use their thumb to massage these points in their hands or feet. 

This is not only simple and minimally distracting to others, but an effective way to calm and balance those organ-systems in the body. The child can do this for himself when needed.

For older children, when you combine these pressure techniques with deep breathing exercises the effects are multiplied. The result is a powerful technique you, your child or your student can use anytime, anywhere to calm and relax.  

In the last post, I instructed you to cut the noodles in half. This time, we will  cut it into 4ths. Take one of the the pieces of noodle and set it on the floor as shown at right. Have your child-or students-in bare feet-(socks are OK but bare feet gives a more full tactile experience & better input.) place their foot over the noodle & roll their foot back and forth the whole length of foot from heel to toe. They can apply a little pressure by stepping down if they like.

This technique can also be applied to the hands as shown in the photo at the left.

Be sure to have children switch and do BOTH feet or hands or this may have the opposite effect-and leave a feeling of unbalance. 

Try it yourself. You can also use a tennis ball, small stubby therapy ball or a super bounce rubber ball.


For more information about reflexology & acupressure, please contact barbara@bodylogique.com


Monday, August 22, 2011

Mind Over Body

This weekend I was out with my daughter looking for a baby shower gift. In our travels we came across one of those blood pressure machines you see in pharmacies. (She has always been fascinated with those for some reason! ) She asked if she could take her blood pressure and told me in a very authoritative way,  "You should check yours too mom!"

I decided to use this as a teaching moment.

Although my daughter (soon to be 12 years old)  is a fun loving free spirit, on occasion she tends to get stuck on memories of upsetting situations. I have taught her imagery techniques to help with this, but as she gets older she is becoming resistant to my help. I don't think she really 'believes' that these techniques can really help or that they have any scientific validity and that I'm just another grownup trying to gain 'compliance'. I decided I would show her how well imagery works so she could see it with her own eyes.

I let her go first, (Her reading was 'normal' but her heart rate was slightly high, most likely because we had been walking for a while. )

Then I sat down and told her that I could control my blood pressure with my thoughts. She laughed. So I  told her to push the button and start the reading. First I just sat there quietly & did a regular reading - 120/75. (She understands what 'normal' blood pressure is.) I told her this is a 'baseline' reading. (120/80 or lower is normal blood pressure; 140/90 or higher is high blood pressure.)

I removed my arm, sat still a moment & told her to repeat the test. This time, I talked about every person who irritates me & every upsetting memory-past and present- I could think of off the top of my head, like she does sometimes when she comes home from school. (She started laughing because apparently I was making my angry face too which she finds not only unnatural to me, but hilarious!)

The machine finally stopped. The reading was 146/90. She knew this was high & she was concerned. (Side note: I am 46 years old and going through biological changes and have been working to maintain a healthy weight. She was concerned because she hears other people & family members taking about 'getting old' and she associated this high reading with me getting 'old'. She has lost close family members when she was very young & now at the age she is this is all very scary. When someone says 'old' and she hears 'sick/death'.)

I reassured her and told her that I am not 'getting old' - and that I was not sick. I made my pressure go high with my thoughts. I told her to remember the first reading & compare.

I took my arm out, walked around for a moment and sat down again. This time when she started the test I spoke in a quiet voice about all the fun things I've done-many with her-and I imagined our favorite place-the beach and resting in the sand (Much like my Starfish Imagery.)

When the test was finished, the reading was 111/72. A significant drop. She was speechless.

I realize that this was not exactly a controlled experiment or ideal environment, but for my purposes, my point was made. With daily practice, you can feel calm and relaxed, and keep your body's reactions under control no matter what is occurring around you. Most children can learn these same relaxation techniques and how & when to apply them when they need to.

Your mind-your imagination- is the most powerful tool you have. It can and does have control over your body.

The good news is, you have control over your mind.


Find the Starfish Imagery  here to start practicing!


.

Saturday, July 30, 2011

Labyrinth Adventures

Labyrinth & mazes are found all around the world in many cultures and civilizations. Designs have been found carved in rock, clay tablets, mosaics, manuscripts and pavements. The significance of them for the various cultures they were part of and the story of how they developed from one place to another is often mysterious and hard to grasp.
The labyrinth has long been associated with the legend of the Minotaur, the monster half-man half-bull which resided in the heart of a labyrinth on the island of Crete. Theseus was able to get to the center of the labyrinth, slay the Minotaur and find his way out again by following a thread he had trailed behind him on the way in.

A labyrinth differes from a maze in that it has only one path that weaves its way to the center and back out again. There is only one entrance and exit: no dead ends, and no choice of which way to turn. In recent years, labyrinths have seen a resurgence as an interactive tool for spiritual reflection, meditation and focus.

Several weeks ago at the Summer Connections Camp at  Teamwork Wins (a local camp for children with Asperger's and other hidden challenges) I created an outdoor labyrinth using some colored rope. The theme of the week was "Treasure Hunt" or "seeking & finding that which is hidden". I thought this would be a good time to introduce labyrinths to the kids.

I first gave each camper a printable labyrinth to use on the tabletop (Find "Printable Labyrinth Activity" here) and showed them how to use it. Then I told them that there was a large labyrinth in the yard that we were going to use topractice concentrating and relaxing. They were excited!

It was a very hot & humid day so I didn't keep them outside as long as I wanted. Had it been cooler I would have allowed them to do a relaxation & guided imagery when they got to the center.

Some of the feed back I got was great:

"It took longer than it looks."

"Its really hot out here, but I feel calm and relaxed anyway."

"That was COOL! Can I do it again?"

and my very favorite: 

"You MADE this for us?"

I thought the best way to show you what we did was with a photo album journal. You can view the
album here:

Labyrinth Day

I'd love to hear about how you have used labyrinth activities on the playground, in therapy or in the classroom!

Here are some other links to learn more:

http://www.labyrinthresourcegroup.org/manual.html

http://kidsrelaxation.com/2011/03/21/labyrinth-activities-to-calm/


.

Thursday, November 18, 2010

Self Calming & The Four "B's"

I don't know if its just me, or if its the pre-holiday activities, but it seems that all of the children I have worked with in the past few weeks are just bundles of energy! Its been a challenge to get them to focus for more than short  intervals.

The Four B's is a technique that Pediatric OT, Lisa Baum showed me last week in our very energetic kids yoga class. Its a systematic calming process that she teaches her students to help them calm down, concentrate & regain self-control. Its very easy to teach to your child or students and this blog will take you through the 4 steps.


"Brake"
Brake:

The first thing Lisa has the children do is to put a "brake" on their excess energy.

She has them do this by pressing the palms of the hand together firmly as shown in the photo at the right. This helps to release excess muscle tension.
"Breathe"
Breathe:

Breathing is another vital tool in creating a sense of body awareness & restoring a sense of calm.

The children take a breath with their hands on their belly button, as shown in photo to the left, remembering to breathe deeply into the belly. (You can instruct your child to use 3-5 breaths)


Brain: 

"Brain"
By placing their hands in the top or towards the back of the head, and applying slight pressure, (as shown in photo to the right,) the child can 'activate' the brain, and create a sense of alertness & deeper calm.

This also will stabilize & "ground" the body.


Body:

"Body"
The final step in this process (shown at left)  is for children to cross arms in front of body and apply pressure as if to "hug" themselves.

The squeezing pressure on the arms and shoulders increases body awareness and assists in the sense of "grounded-ness" and security, which further calms the child and helps them stay focused.


These easy steps can be applied quietly and inconspicuously at home, school, church or synagogue, while at dinner in a restaurant (or in dance, yoga, karate or any other class) or anywhere a child needs to reduce fidgeting & regain a sense of focus, calm & self control.  Once the steps are learned, all that's needed is a gentle occasional reminder of  "Where are your 4 B's?".

* To download a FREE full color photo flash card of this technique click here or e-mail your request to: Barbara@bodylogique.com  .


For more information on our R.E.A.Ch™ program (Relaxation Education for Adults & Children) which teaches smany more stres reduction techniques, please visit Barbara at: BodyLogique.com 

To purchase our "Calm & Connected" book on Amazon, click the links below:

Print Edition

Kindle Edition


For more information on Pediatric Occupational Therapy visit Lisa at:


.

Sunday, July 25, 2010

Breathe-Relax!

My son called me yesterday. So how did this get to be a blog topic? Well, I always love to talk about my kids, but it was the content of the call that became today's topic. I will explain.

He called to tell me that he passed (with flying colors) a national certification test for his job. He was ecstatic, talking very quickly & was almost breathless as he  told me about it.

Then he told me he was so stressed & asked me for some breathing & relaxation exercises to calm him down before he took his field test. It took me by surprise, because he is very easy-going. I have never pushed or expected any of my children to practice yoga, only invited them to try if they wanted. Now my 26 year old son who has never set foot inside a yoga studio, in spite of always being supportive (just from a distance) of my yoga & dance teaching, my vedic chanting music, my rain sticks & other assortment of odd musical instruments, was asking me for interventions and he was serious. I could hear it in his voice. After a quick phone-coaching session, he was better and went on to his field test which he also did well on.

My point today is that we don't usually associate stress with good news or happy events, but these can also create a stress response in the body. We  need to take moments throughout our day to release this tension that builds up not just in our mind, but in our bodies too.

My son was experiencing a stress response and maybe did not realize it at the moment because he was excited about his test results. What he did recognize was a need for something to reverse the sensations in his body-(nervous stomach, heart pounding, short of breath, perspiration). Although he could not remember how to use it, he knew the one tool that we all have that will immediately help us in times of stress: our breath.

It has been known in China and India for thousands of years that the mind. body and breath are all inter- connected and that the breath can be used for balancing all the body's responses, including stress.

I will tell you a secret: Ironically, the divorce from my son's father many years ago was a pivotal time where I learned how to control nerves, fear & migraine headache pain with my breath and imagery. At times, I still momentarily forget this wonderful tool and how to use it. I react to people & emotion and get scared, angry, overwhelmed and frustrated as well. It happens to me during happy times also. The difference is that now, with this knowledge, and after years of practice and application, in times of calm I remember to breathe for relaxation-so that in times of stress my reaction/ recovery time is shorter and less destructive.

Breath techniques are a tool that every child can learn, so that as they grow into teens and adults, a relaxation response to stress becomes the habit, rather than a stress response. I wish I had thought of teaching this to my sons as they grew through many transitions-some painful-in their young lives. Now, as I had my son on the phone, I felt this was an important moment-maybe even a second chance-to be in a great place both  in maturity & knowledge to help him, which is what I did.

The opposite situation can occur too, where a person can be too calm, to the point of being complacent and not take action when they should which can be equally destructive. I have also experienced this effect. (Yes, you can be "too calm"!) Practicing Energy breathing can release muscle tension, clear the head, improve focus and motivate a person to take action when they feel wronged or a need for boundaries. Action is very different than reaction. On of my greatest lessons in Life is how the breath can help regulate & balance these two responses.

So for today, here are a few quick exercise to try (for adults & kids):

Belly Breath:
(Deep Breathing) This allows the lungs to fill up completely with oxygen and subsequently improves focus and calm. It will also help clear congestion.)

Place your hand on your belly, over your naval. When you breathe in, allow the breath to come in deeply, through your nose, so that your naval area expands & your hand moves out. When you breathe out, (through nose or mouth) your naval area will contract and your hand will move in. (To teach this to children, have them lie on their backs and place a small toy boat, dolphin, fish, frog, etc on their belly so that it can move up when they breathe in, and down as they breathe out.)

Energy Breath:
(Sometimes called "Big Breath" when working with the very young) Helps release tension, clear the lungs of congestion, increase energy and improve focus.)

Hold a small craft pom-pom ball or cotton ball in the palm of your hand. Take a big breath and blow the ball off your hand as far as you can. (For kids, you can give them each a different color to see how far they can make it go each time.) Even the very small and children with adaptive needs can practice this to some degree.) You can practice this about 3-5 times at first and gradually work up to 8-10 times. Last winter, I even had one Adaptive class of teens work up to have a "snowball fight" this way, where each side of the room had to blow the "snowballs" to the other side and keep away the "snowballs" that were coming at them with their energy breath. They still talk about it .

Another way I teach energy breath with little kids is tell them to hold out their hands, palm up and pretend they are blowing out a birthday candle for themselves on a cupcake. This is something most children can relate to. To help them practice a really big energy breath, I have them imagine blowing out 45 candles on a giant cupcake for my birthday!


Calming Breath:
(Sometimes called "Little Breath" or "Quiet Breath" with small children) This is a quieting relaxation breath. It can be used to help induce calm before sleep, and just before, during or after a stressful event or situation.)

Take a quiet breath in through your nose, deep into your belly, to the slow count of 3 (for small children ) or 4 (for bigger kids or adults) Breathe out slowly to the count of 3 or 4.  (You can also use the cotton or pom pom ball for this exercise only this time, the ball must stay in the child's hand and NOT be blown off. This exercise will quickly teach breath control.)


Laughing Breath:
(Reduces & releases tension and improves respiration.)

Breathe in slowly and deeply-and as you breathe out laugh!

These are just a few ways that breathing can be practiced & used by all ages to keep the body balanced and calm. There are many others! I hope you find these few to be helpful! To learn more about fun ways to teach yoga and other healthy techniques to your children or  students, please visit us at: http://www.bodylogique.com/

To schedule a customized evaluation for a Stress Reduction Plan for yourself or your child, please contact me at: Barbara@bodylogique.com


Love & Laughter!
~Barbara


(Pictured from Left: My oldest son Michael, his father, my younger son Steven and myself at a music & arts event the boys played at 3 years ago . This is the only photo I have of us all together and in spite of the rough road we have all travelled together (and apart,) I'm encouraged and comforted by the fact that we have all moved forward and are better for the experience.)

.